To adequately modify weighting for the avatar, there are a few methods of particular relevance:
Automatic Weights
This is a shortcut – one which attempts to assign the mesh to the bones that are closest to that particular area on the mesh. Automatic weighting is achieved by right-clicking the mesh, THEN the armature in Object mode, then Parenting the former to the latter by selecting ‘Ctrl + P’. This brings up the ‘Armature Deform’ menu, from which ‘Automatic Weights’ should be chosen.
It is important to note here that with human avatars, it’s usually possible to use it to predict which parts of the mesh should be associated with which bones. The same cannot necessarily be said for avatars that depend upon a modified skeleton (like this Corgi). Sometimes Bone Heat works, sometimes it doesn’t. In any case, there will always be some degree of tweaking required afterward, so tools such as ‘Automatic Weights’ should be considered a useful tool in most cases, but not a magic bullet. This is why the following two methods are also very important to learn.
Manual assignation:
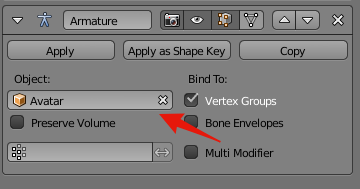
To accomplish either of the following two methods, the mesh needs to be parented to the armature. This can either be done by choosing ‘With Empty Groups’ from the Armature Deform menu (which we got to by selecting the mesh, then the armature – both in object mode – then hitting hotkeys Control + P) OR selecting the mesh and adding an Armature modifier, taking care to point the ‘Object’ field in that modifier to the appropriate armature.
Once this is done, the mesh can be weighted using the first, second or both of the following methods: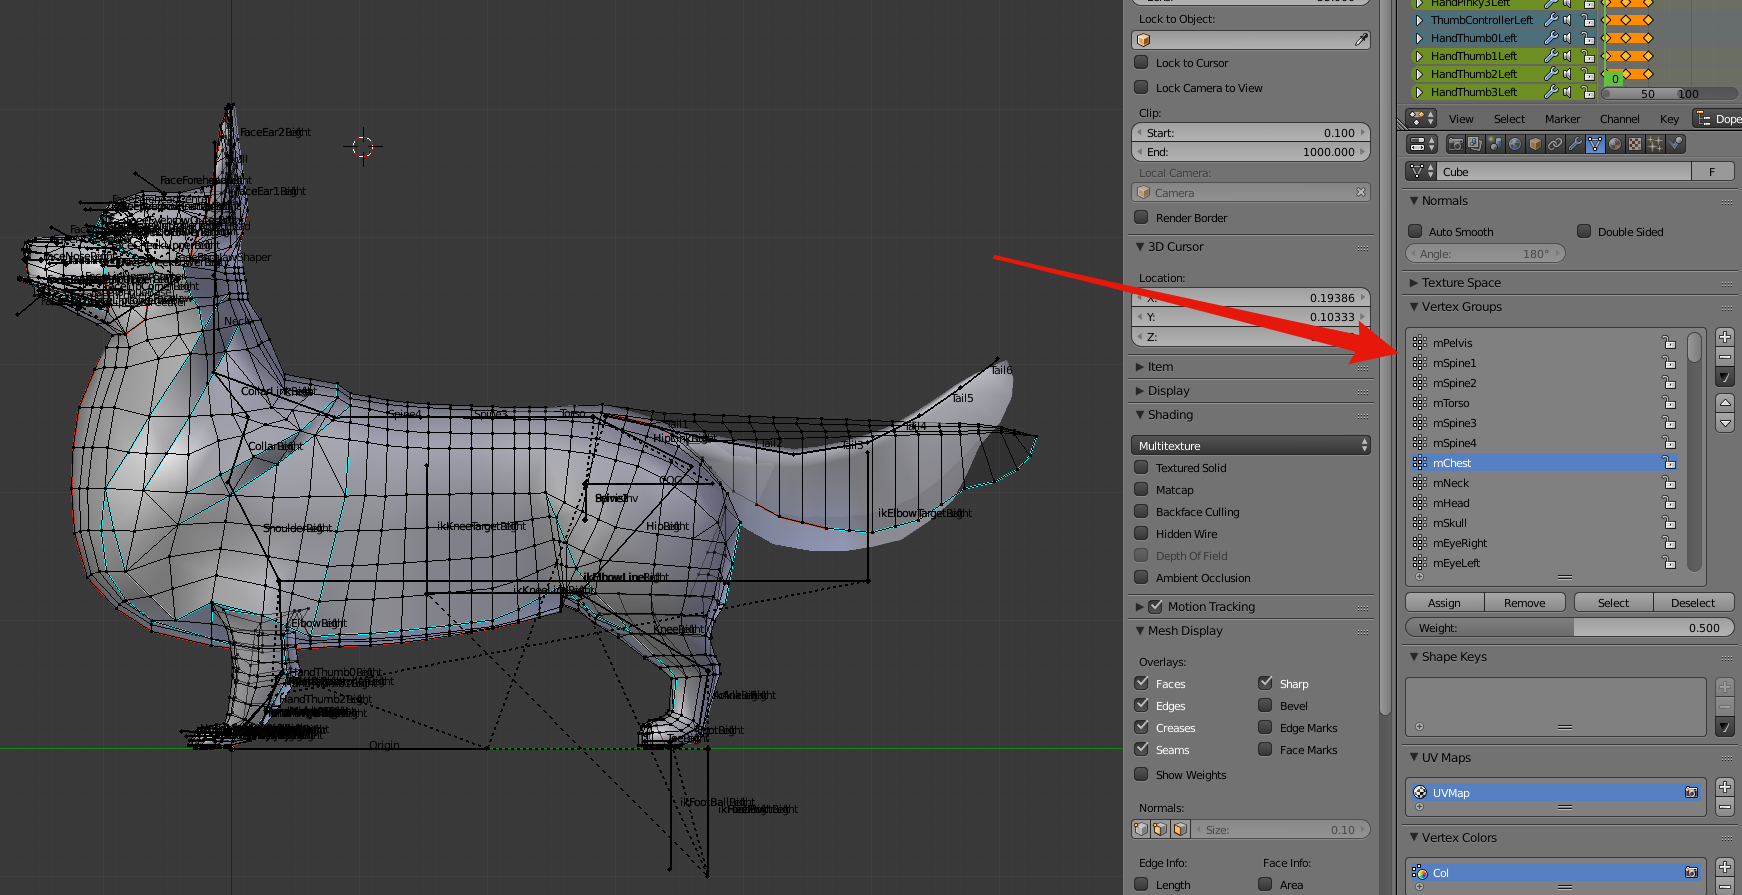
A) Assignment as an Edit Mode property – by selecting a single vertex or a whole group of them in Edit mode, you can affect their bone weighting by choosing the (above) indicated menu in the Edit properties tab, adjusting the associated weight and then hitting either ‘Apply’ or ‘Remove’. Vertices associated with a given bone can also be selected or deselected in this same menu.
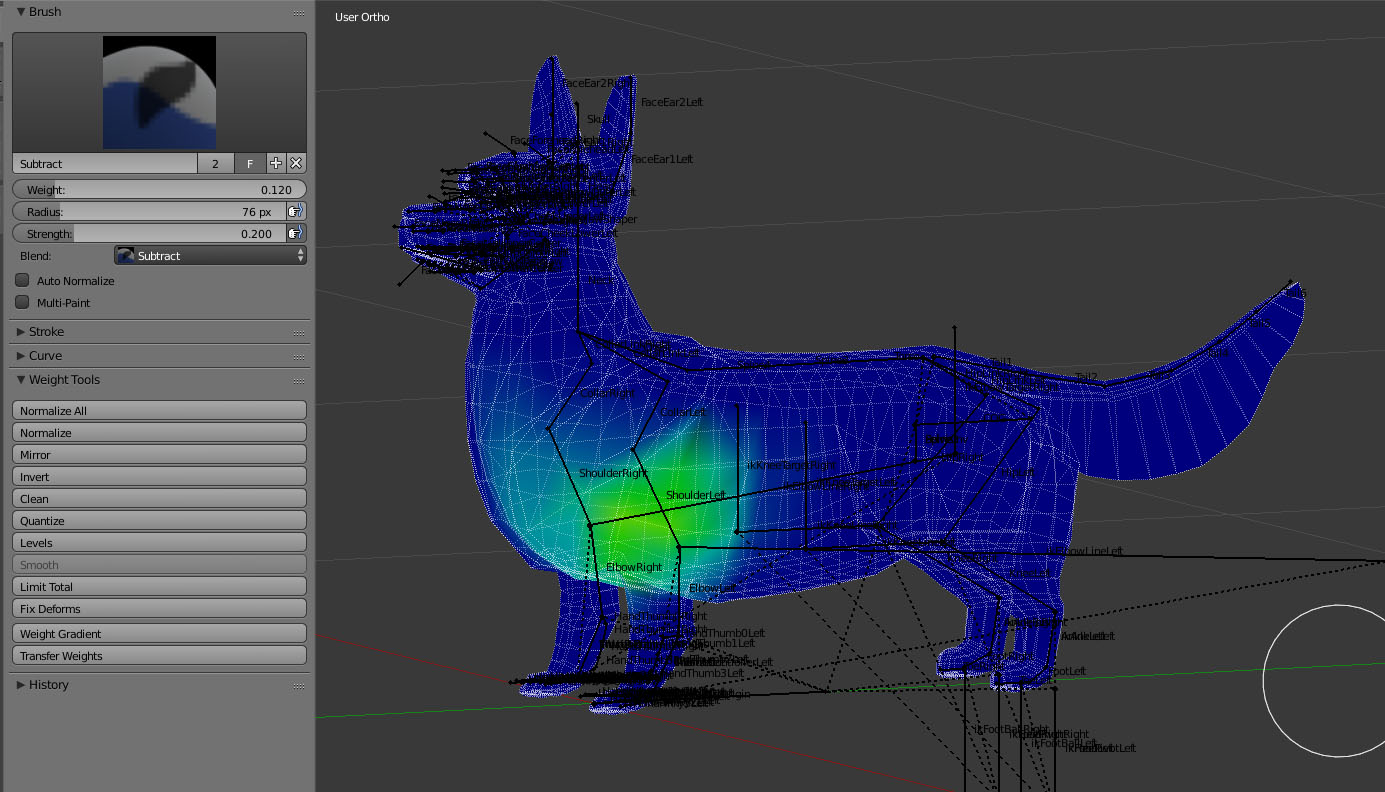
B) Weight Painting – This is a weighting method which allows you to visualize the degree to which verts are weighted to a particular bone through the use of colour. It allows you to use a digital brush to add, subtract, draw, lighten, darken, blur or otherwise affect bone influence, which in this mode is represented by a gradient of colour, ranging from blue (no influence) to yellow(middling influence) to red (full influence).
There are pros and cons to using each of these methods and almost 100% of the time, I use the second method *after* having used the first, in order to make it look more natural.
The weighting process with the cute, fuzzy and not-at-all skinny corgi has been, inevitably, a bit different (and long-winded) compared to weighting the sleek & non-squishy Drider avatar covered not too long ago.
I’ve always found this to be the case – coming to a happy medium between influence from multiple bones in a soft mass is a very organic process that depends heavily upon an understanding of what you want to move, and where. Don’t be discouraged if this doesn’t work out right away. Understanding a lot of this comes with experience & experimentation.
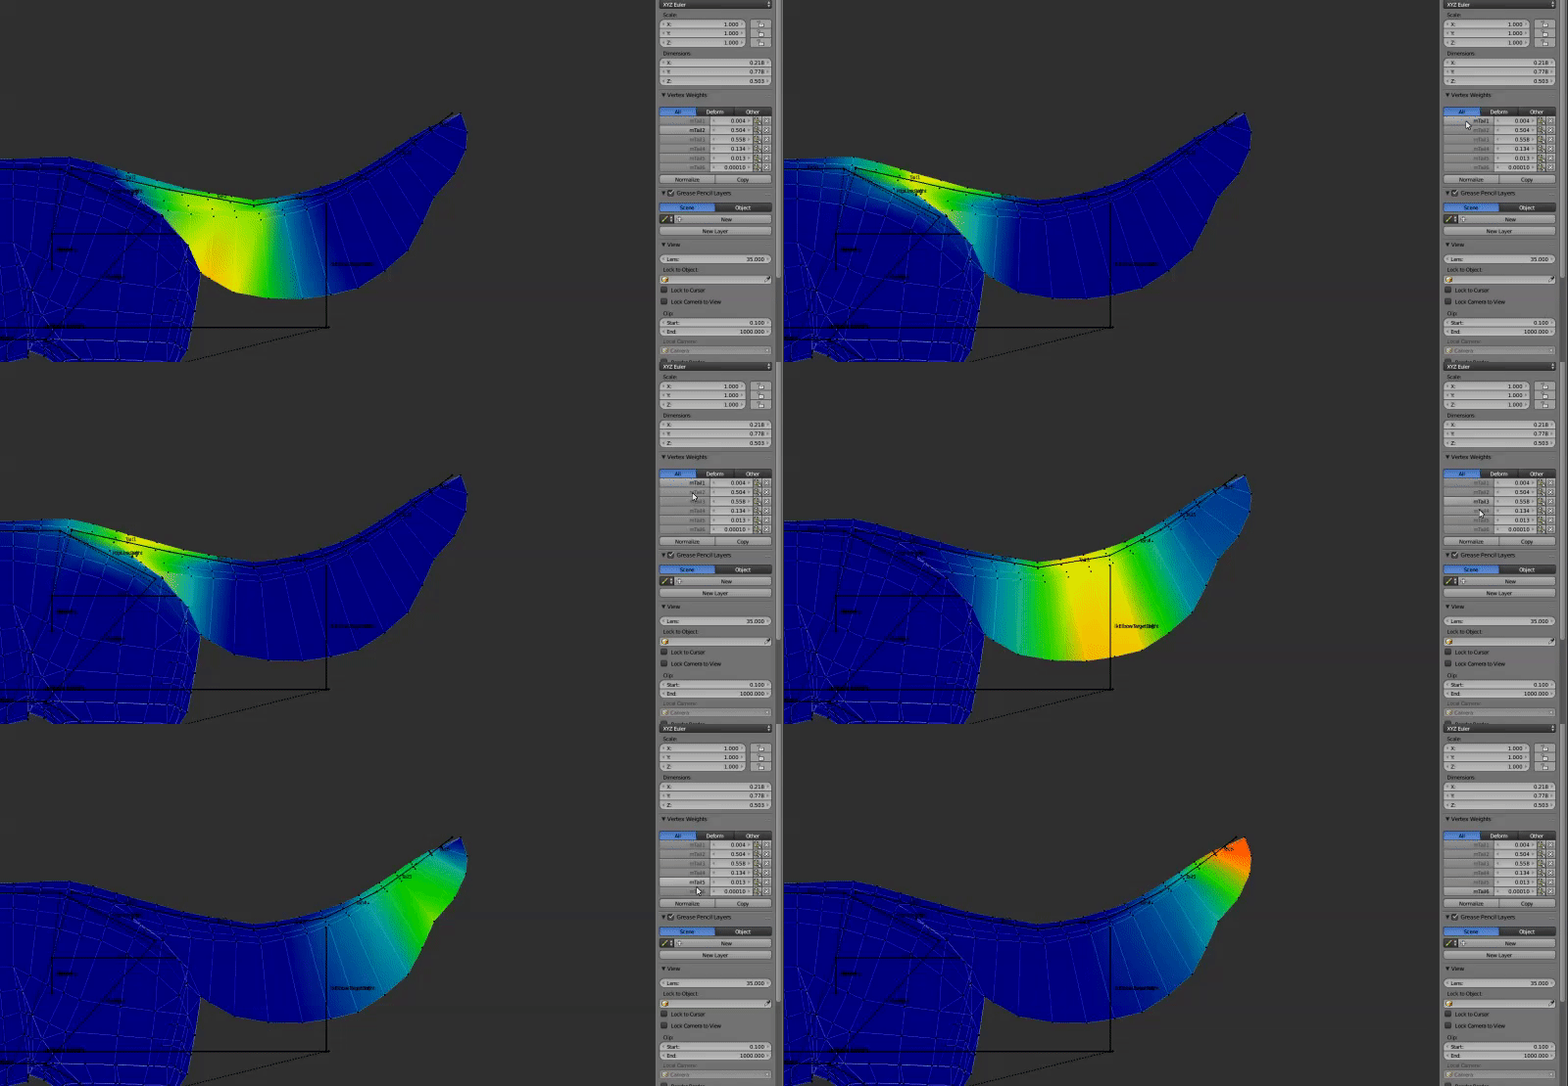
Whereas you can (for the most part) assign heavy influence of a rigid mass to a single bone, rigging to ensure smooth movement along a curvy mass often requires more of a gradiated transition – sometimes extending well past the immediate location of the bone.
For example, you could weight mesh along a tail rigidly, but when it comes time to move it, the mesh will be overly faceted and easily visible from afar as being unnatural.
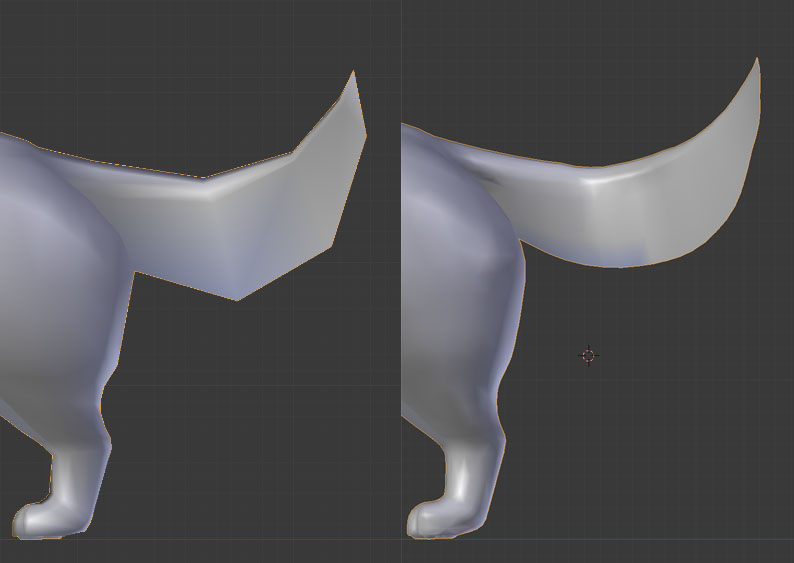
It’s at this stage that I have added more geometry to critical areas, such as joints and the tail.
Maintaining a low poly-count to start with is very helpful in reducing additional work when it comes to correcting delicate bone weights, but it’s also in these cases where adding intervening geometry is appropriate, and this is why, despite having used a Subsurface division modifier to visualize, I have not applied such modifiers permanently to my mesh. Being able to easily select and divide up edge loops and rings manually allows me the greatest ability to create more natural shapes while maintaining clean edge-flow.
The weighting and animation processes are inevitably intertwined. In the next little while, I’ll not only be animating but correcting vertices with stray weights as well. I will often be animating, find that a certain movement affects the mesh in some negative way, and as a result find that I need to go back to editing weights to prevent any significant negative outcomes.
It’s also during this process that any final joint position tweaks should be made. As was mentioned in the previous post, it’s important to ensure any such position changes are carried out between *both* the Control bones (green) and the Deform bones (blue, purple, red). Failing to do so can cause some unpredictable results upon export.
So far, I’ve explained the concept of these weighting methods and discussed a few pitfalls, but I’d like to delve a little deeper next week with some video content, demonstrating the use of these Weighting tools in greater detail. If you’re looking to learn about weighting with Blender & Avastar and have any particular questions for me to work in to these videos, please leave a comment here or drop by my Discord server for a chat within the next couple of days! (Latest March 4, please!)
If you enjoy what I’m doing here or think someone else might also find it of use, please feel free to share this blog with them. If you’d like to keep up to date with posts, the RSS for this blog is here, I can also be found on Twitter and Plurk. The Discord server is here.
If you really like my stuff, perhaps consider donating to my Patreon? Your continued support helps to produce weekly content (written, modelled, animated or otherwise) and helps to keep original content creation in Second Life!
Thanks for your support!
