Animesh Hits Organica – Weeping Willow Trees Now Available!

It’s been a while since I discussed this project – I covered initial development for these trees in late 2017/early 2018, but they were put on the back-burner due to a shadow rendering issue that affects how shadows are rendered for transparent textures on rigged objects.

While previously this was a known (but low priority) issue for avatars, it’s become increasingly necessary for Linden Lab to address this with the onset of Animesh. Fortunately, Graham Linden has been tasked with finding a solution and progress on the issue appears imminent (Inara Pey reports a solution has been developed and waiting for release via the viewer pipeline eventually).

With all that said, I decided to move ahead with the Weeping Willow despite this problem because it would be unlikely that any changes be made to accommodate shader fixes on the viewer side, once they have been committed. 
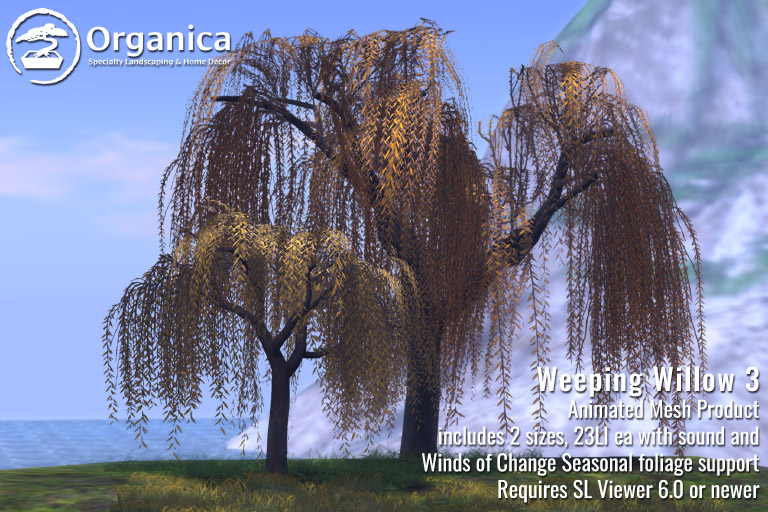
In the past week, easily 30-40 hrs have been put in developing new textures and revising existing animations to be more natural and appropriate to region wind speeds. I’ve also been very fortunate to work with NeoBokrug Elytis of Desolate Studio to develop an extensive feature set that I am sure you will appreciate!

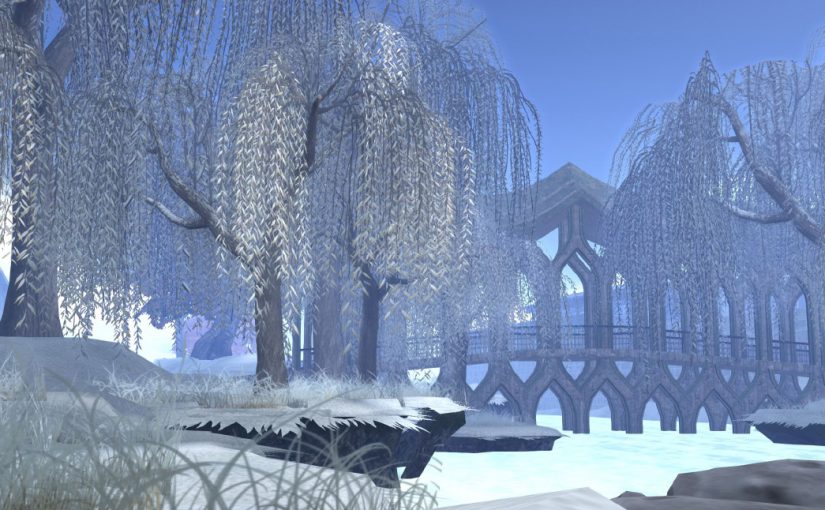
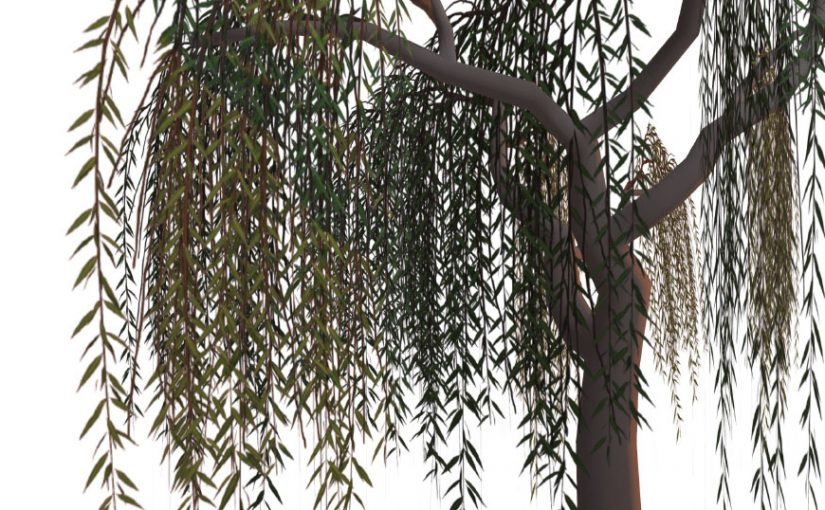
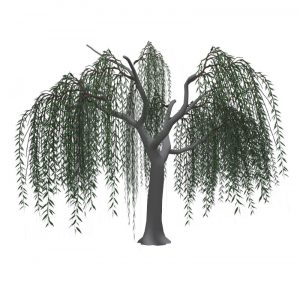
So it’s with much excitement that I offer this set of Weeping Willows for your consideration:

Features:

The Weeping Willows are the first in a line of trees from Organica that will both offer Animesh support as well as built-in compatibility with the Organica Seasonal Control Module, which will allow for mass foliage change of Organica: Winds of Change-compatible products both region-wide as well as parcel-specific.

The Willows are set to animate and rustle in relation to Second Life region wind. They change texture (Spring, Summer, Fall, Winter, Dead) on command from the included SCM, but you can also set foliage by individual tree as well if you wish.

All settings can be secured to owner, group or anyone.

A few caveats:

  • As an Animesh product, a compatible viewer must be used to view it properly. If your viewer has updated to 6.0 or better, you’re all set!
  • Due to the nature of Animesh (it snaps back to the size defined by its armature and animations), only two sizes are currently offered and this tree cannot be resized. I’ll be doing some experimentation and hopefully more sizes will be available in the future – any additional sizes to this product will be sent as a free update.
  • As discussed above, shadows from this product are not currently cast properly. Keep an eye on JIRA BUG-202837 or at Content Creation User Group Meetings for movement on this problem – I will also announce once I learn this has been fixed.

The Weeping Willows are offered mod, copy, no transfer with copy-only scripts, animations and sounds and are optimized to 23LI each (Land-impact of future additional sizes may vary). Full documentation for use of the Organica Animesh Tree System available here.

Special thanks to Aposiopesis Fullstop for her consultation on our documentation as well as the Residents of The Wastelands for being our guinea-pigs in our latter testing stage.

You can pick up the Weeping Willow 3 pack, mod/copy object, copy-only contents, in-world here and on the Marketplace, here

Willow Tree Process (Part 2)

Today, I figured I’d touch on my process for creating textures.

While many folks prefer to use a photograph for their texture, I’ve always worked from scratch, creating my own textures digitally, while referencing a large number of photographs for ideas and clues about growth habit.

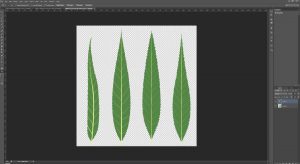
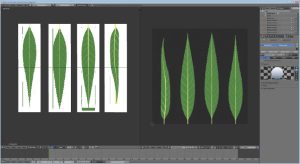
With respect to trees, I usually start with a few variations on a base leaf, taking care to work out the base silhouette.

In the case of weeping willows, the leaves are narrow,oblong, and taper gradually. While the final  product will ultimately be much smaller and not show small details like serrated edges, I usually add them anyway, along with veins so that these elements can give hints of themselves later.

It’s usually a good idea to create a variety of different leaves, even if they are a slight modification of one base shape. This allows the final branch texture to have some variation to it, even if, at a distance, the differences are small.

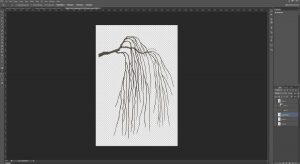
Sometimes, the use of traditional media for texturing is helpful too. I have used my share of drawing tablets but (even considering the use of Cintiq tablets) none of them can truly replicate the intuitiveness of simply taking pen or pencil to paper and simply drawing.  Sometimes, it’s just easier to sketch out a base to work from, clean it up or paint over it, rather than drawing and erasing ad nauseum via tablet, and this is what I’ve done here.

This and some other branches were drawn with pencil, scanned, cleaned up and painted over.  Using this process, I was able to put together a sideways branch, which is now at a prime stage for the addition of leaves in Blender.

I usually start by unwrapping the UV of a plane to fill the whole area of a UV layout matching the proportions of my leaf texture. In the Node Editor, this object gets assigned a material with the leaf texture as a diffuse map. I additionally assign transparency to the material, using transparency from the texture to be the deciding factor in what gets rendered.

The plane gets cut up so that each piece of geometry gets a different leaf. I then also bring in the branch texture and put it on a vertical plane object (using a similar node setup as above) by adding it to my Diffuse Map node in the Node Editor.

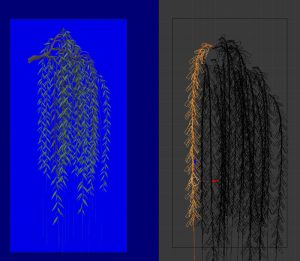
Once this is in place, I divide the Blender windows such that I can view a preview in Render mode on one side as well as edit in either Texture or Wireframe mode on the other. This allows me to move leaf textures to match the branch texture relatively quickly, while still seeing the results (and how the transparent textures interact with each other) in real-time.

In this case, leaf geometry was laid out and duplicated with an Array modifier and also given a curve modifier, so that the geometry would conform to an extruded curve (to act as a stem). This allowed me to move and deform the long string of leaves in any way I wanted.

Special consideration is made to maintain variation and depth. Being able to use a 3D program to put together this texture means that I can take the time to create parts of the foliage which move forward or recede. Setting my texture workflow up this way also means it would be easy to replace the leaf texture later for other texture sets (fall colours, for example).

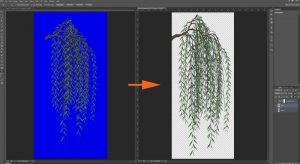
Once I have an arrangement I’m happy with, I add a solid emissive blue background, set up some appropriate lighting, position the camera and take a render (F12) of the camera view.

The result gets saved and opened in Photoshop. I select as much blue as possible, then delete it from the layer, leaving behind a transparent background. I then add a Hue/Saturation adjustment layer and de-saturate any remaining blue colour on the preceding layer.

Any additional cleanup should be done to the texture at this stage. I save a .PSD file as well as a .PNG at full size, then I repeat the placement process for branches along the full trunk. Once I have finalized placement, the file gets saved again as a .TGA, with an appropriate background & alpha channel and at a more SL-appropriate image size.

There can be a lot of experimentation at this stage and the solution, for trees, isn’t always a flat billboarded texture. As it stands, this tree still looks a little spare!

In my next article, I’ll show what additional geometry and texture work goes in to making the tree look believable from multiple angles.


If you found this or any other of my articles helpful, please consider becoming a Patron! Doing so supports further articles of this kind and my content creation in general.  Alternatively, if you like the sorts of things that I make for Second Life, drop by my Marketplace listing or my in-world stores and check out what I have to offer!

Unless otherwise noted, I (Aki Shichiroji) and this blog are not sponsored in any way. My thoughts are my own and not indicative of endorsement by any associated or discussed product/service/company.

Willow Tree Process (Part 1) & Bezier Curves

The last week has been a bit nuts!

Family is up from the States this week, so there was a family dinner. I also took a bit of free time earlier today to pick up a lovely vintage table for my kitchen, which is sorely lacking in the style department.

I am overseeing and creating content for a couple of new work projects and hope to be able to talk more about them soon – in the mean time, I figured I’d touch a bit on some work in progress I’ve got in mind for an upcoming Organica release.

It’s been a *long* while since Organica offered a weeping willow. Simply put, it’s mainly because I am not real big on flexi prims being linked in to mesh and, back when I did make some, we only had alpha blending (and not masking) – so it would be common to run in to issues where some textures would overlay others in an undesirable fashion.

With those caveats in mind, I figure it’s a good time to revisit willows, because let’s face it – a naturally moving  tree would be a great example of non-animal Animesh.

While I won’t touch on the rigging just yet here, I will at this point discuss my general modelling & UV layout process.

The process begins with a simple cylinder – usually with no more than 12 sides, and with the length divided a multitude of times. I usually create the UV layout for this cylinder pretty early on (even though I do later unwrap the geometry again) because multiple copies will be made of this cylinder and it’d be nice not to define seams for each and every one.

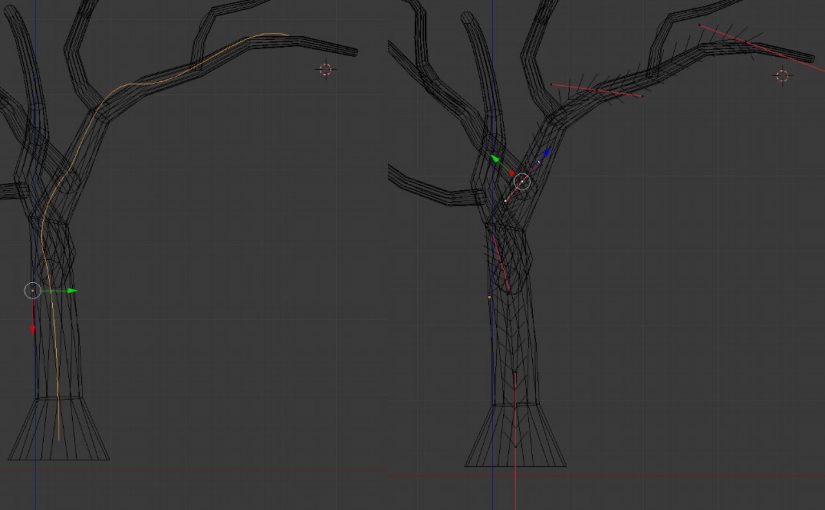
While I could probably define the shape of the geometry by moving the verts around,  lately I’ve taken to adding a Bezier Curve nearby and applying the curve as a modifier to the cylinder, taking care to apply scale and location before any heavy modification takes place.

By using a modifier, non-destructive changes can be made, allowing for a considerable amount of experimentation in placement and rotation prior to committing to a final shape. In this case, I am moving various nodes in the bezier curve to direct the overall direction of the mesh.

How does one use Bezier curves?

Assuming you are already familiar with how to move, rotate, scale and extrude vertices, edges and faces in geometry, Bezier curve nodes are similar to individual vertices (although more accurately, they are very similar to NURBS nodes).

A Bezier Curve in Blender (in object mode on left, edit mode on right)

Basically, each node along a curve is accompanied by a pair of handles which control the direction of the curve directly before and after the node. They are always 180 degrees from each other. The closer these handles are to the node, the shorter the area of influence they will have.

The default bezier curve will give you two nodes. You can add nodes in between by dividing the space between the two in the same manner as you would between two vertices. You can also extrude additional nodes from the start or end of the curve.

You can either apply this curve to existing geometry (using the ‘Curve’ modifier’) or extrude some basic geometry along the curve (using the ‘Curve’ properties menu, when the curve is selected). There are some additional advanced things you can do to this extruded geometry (such as non-destructive tapering or bevelling) but for the purposes of this demo, I have only applied my curves to geometry as a modifier.

It should be noted at this point that, even at top level geometry, I do not subdivide at this point. This is important, since fixes will later be necessary to clean up the results of proceeding workflow. It’s way less hassle to redirect and merge fewer vertices than more. If smoother, more curvaceous transitions are needed, subdivisions should occur after the final UV layout has been finalized (IE: not now!)

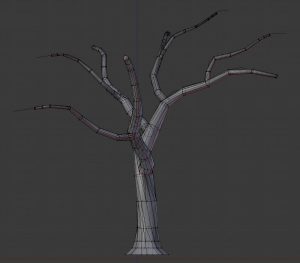
After the trunk has been defined, I select both the mesh and the curve and duplicate them at the same time, adjusting basic position, scaling and rotation at the Object level, then editing individual branches for variety by selecting the appropriate curve and editing in edit mode.

After I am satisfied with all the branch placement, I join each branch to the main trunk using a Boolean Modifier (‘union’ setting) to create the branch geometry in the same object as the trunk and also to join it with the trunk. This leaves behind a copy of the original branch, which can either be archived to a different layer or deleted entirely.

I do this for all of the branches, then go back and check each of the joints between the branches and trunk.

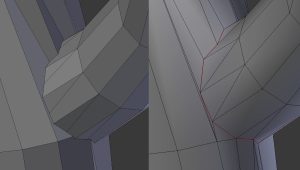
Before (left) and after (right) some vert cleanup at the branch/trunk joint. Also, seam assignment.

Typically, use of the boolean modifier will create extraneous verts, showing the point at which each face intersected with its adjacent geometry. This is, by and large, undesirable and I will usually either merge several extraneous verts to converge on one desired vert OR i’ll select edge loops and slide them in the correct direction, taking care later to remove any remaining duplicate vertices. Checking for N-gons (polygons with more than 4 edges) should also be done at this stage.

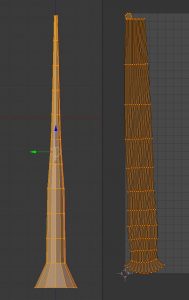
Cleanup is done around each joint, after which I attempt another UV unwrap to achieve a nice layout that is fairly clean, not overly stretchy, correctly scaled and laid out in a convenient direction.

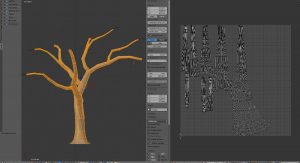
Tree trunk & branch UV layout

The overall silhouette and UV layout have been achieved. Further modifications  within these constraints (additional edge loops to create more curves, for example) would be ideal at this point.

We’ll leave it here for now. Next week, I’ll discuss foliage geometry, layout and general texture creation.


Did you know I have a Patreon account? If you enjoy this content, please consider becoming a Patron! It helps me create more like it and offers a variety of rewards. Alternatively, if you like the sorts of things that I make for Second Life, drop by my Marketplace listing or my in-world stores and check out what I have to offer!

Unless otherwise noted, I (Aki Shichiroji) and this blog are not sponsored in any way. My thoughts are my own and not indicative of endorsement by any associated or discussed product/service/company.